
Version Control for Obsidian
Posted on | #obsidian #journaling #writing #shell
Idea: Implement version control for my Obsidian Vault stored in my iCloud Documents.
Inspiration: The book The Pragmatic Programmer encouraged me to implement version control for all of my work and to learn Shell for automation purposes.
I thought, "How hard could it be?" - and voilà, after only one full day of work and swearing, I was able to successfully automate version control for my Obsidian Vault.
The Plan
- Create a new folder on your MacBook called
Version Control Obsidian, copy your vault into this folder. - Put that folder under version control via Git and GitHub
- Copy your Vault Folder in iCloud Documents to that
Version Control Obsidianfolder and commit changes and push to a private GitHub repository with a launchd job of a shell script once a day.
The Execution
Because of safety measures in MacOS launchd jobs can't get access to the Documents, Downloads, and other folders. So we have to create an Automator app which will then get access to the Documents folder and can cp the files and commit etc.
1. The Script
#!/bin/bash
cp -R /Users/nilsmango/Library/Mobile\ Documents/iCloud~md~obsidian/Documents /Users/nilsmango/Documents/Version\ Control\ Obsidian && cd /Users/nilsmango/Documents/Version\ Control\ Obsidian && git add . && git commit -m "daily commit $(date +'%Y-%m-%d')" && git push
Make it executable: chmod +x daily-commit.sh
2. The Automator App
Source: Stack Overflow answer by Steven Oxley
-
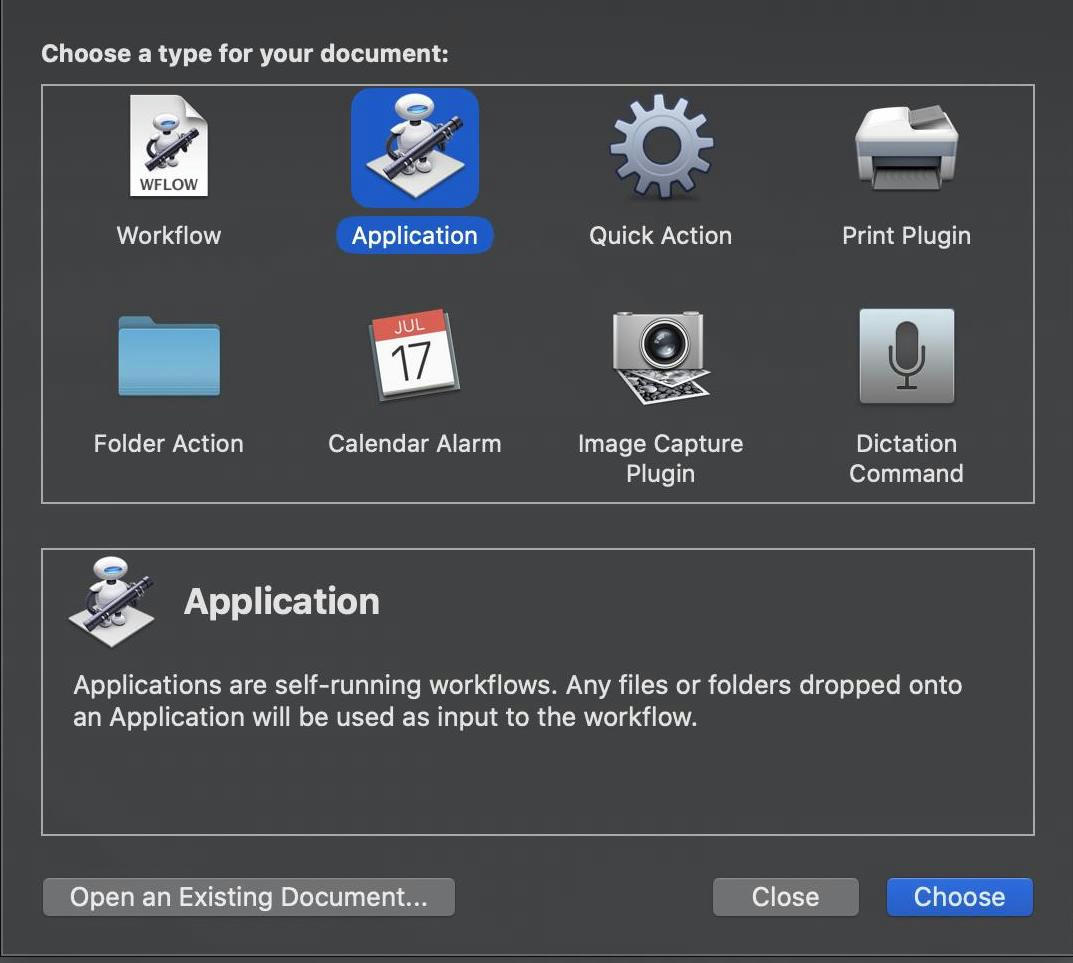
Create an Automator application
- Open Automator
- Click New Document
- Select Application
- Click Choose
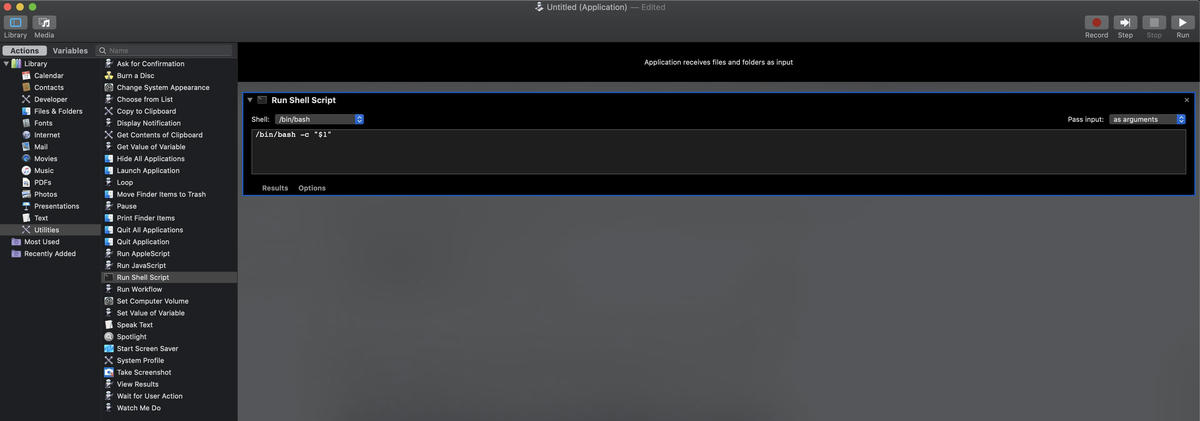
- Select Utilities > Run Shell Script
- Select Pass Input: as arguments
- Enter
/bin/bash -c "$1"as the body of the script (see screenshot below) - Click File > Save and save the application wherever you'd like (
run-script.appin this example)
-
Next, run the application that was just created manually to make sure it has the permissions it needs (you need also grant Full Disk Access to the new application in Security & Privacy, (in my case even Automator needed Full Disk Access))
- Open Terminal
- Execute command:
open -a run-script.app /Users/nilsmango/scripts/daily-commit.sh- Click Allow when macOS asks if the application can access your Desktop
Screenshots:
3. The Launchd Job
<?xml version="1.0" encoding="UTF-8"?>

<!DOCTYPE plist PUBLIC "-//Apple//DTD PLIST 1.0//EN"

"http://www.apple.com/DTDs/PropertyList-1.0.dtd">

<plist version="1.0">

<dict>

<key>Label</key>

<string>com.project7iii.daily-commit</string>

<key>ProgramArguments</key>

<array>

<string>open</string>

<string>-a</string>

<string>/Users/nilsmango/scripts/run-script.app</string>

<string>/Users/nilsmango/scripts/daily-commit.sh</string>

</array>

<key>StartCalendarInterval</key>

<dict>

<key>Hour</key>

<integer>14</integer>

<key>Minute</key>

<integer>6</integer>

</dict>

<key>StandardErrorPath</key>

<string>/tmp/com.project7iii.daily-commit.err</string>

<key>StandardOutPath</key>

<string>/tmp/com.project7iii.daily-commit.out</string>

</dict>

</plist>
Making the document:
nano ~/Library/LaunchAgents/com.project7iii.daily-commit.plist
Loading the launchd job:
launchctl load ~/Library/LaunchAgents/com.project7iii.daily-commit.plist
Got questions, suggestions, comments, or just want to share this post?
→ Share on X, or email me (and I will add it to this post, if appropriate).