
How I Perform Live Electronic Music with Ableton Live
Posted on | Updated: | #apps #music #tap #project7iii #ableton
This is my ultimate guide to playing live electronic music with Ableton Live.
For me, performing live is all about being able to immediately realize any musical idea. That starts long before choosing the right controller. It starts with getting the basics right, building a solid live set, collecting great presets, and then practicing until everything becomes second nature.
The Basics
I usually record my sessions, and because I do not want to sync and edit video and audio later, I do that directly in OBS, a great piece of software you can also use to livestream.
I use external cameras if available (if I am on the road, I simply use the webcam in my MacBook). Usually I have one top view of my controller and one from a bit farther away with myself in the frame to keep things visually interesting. To make it even more interesting, I use an automatic scene switching script inside OBS. Add some good lighting if possible. It makes a huge difference to video quality.
To get the sound into both OBS and the speakers, I use BlackHole with a Multi-Output Device created in the macOS app Audio MIDI Setup. My normal audio output is the first device, the second is BlackHole 2ch with drift correction enabled.
It is very important that the Multi-Output Device uses the same sample rate as Ableton Live.
In Ableton, I use that output as my main output. In OBS, I use it as the audio input. Done.
Use a sample rate and buffer size that give you the best CPU performance. I currently use 48 kHz with a buffer size of 256 samples.
The Live Set
I set things up with a maximum of 8 tracks and a couple of sends. I prefer fewer tracks so I do not get overwhelmed. I also keep effects and routing fairly minimal.
Speaking of effects: using sends is usually much better for CPU usage than placing lots of effects directly on individual tracks.
I have a few master effects on the master channel (for drops and global effects).
Track one is my drum track. That is often followed by another percussion or vocal track (both typically drum racks), then bass, lead, pad, and so on. Each track but the drum track has a compressor with sidechain tuned to the kick frequency of my drum track.
The Presets
To stay inspired, it is very important for me to have excellent presets ready. These are your starting points, so make lots of them.
I keep them in a folder called Live Sets 26, with two subfolders: Effects & Sounds.
Inside Sounds, I have categories like drums (including chopped vocals), bass, acid, and so on. I name things so it is immediately clear what they might sound like.
I change the sounds in the 8 tracks frequently to get fresh input and new ideas. Presets can absolutely make or break a live set. I usually group a sound or effect, add at least 8 macros to each preset, and also create a couple of snapshots. If you have a good controller, it can use those snapshots and even save new ones. The better my own controller, 7III Tap, gets, the less important traditional macro control becomes. Still, macros are very useful because they show which parameters are strong candidates for automation and modulation. As Tap becomes more deeply integrated with Live, I rely even more on direct parameter access.
I only use stock Ableton Live effects and instruments in about 99% of cases.
Drum Tips
Do not make the individual drum pads too loud. You can always push them up later. I recommend a grouped instrument with volume control on each pad. I also like adding global effects to individual drum pads, for example delay and reverb sends. To get send controls inside a drum pad, you need a small workaround:
- Add the modulator
Shaperinto the drum pad group. - Switch the Shaper to
Manualmode. - Map the Shaper to the send of that pad for the reverb or delay (I use Remote, not Modulate).
- Make the Shaper use a linear shape (or whatever you prefer).
- Add the
Manual Encoderto the group macros. - Voilà, individual sends per drum pad.
The Ableton Live Controller
7III Tap is my controller of choice, as I built it specifically for performing completely live with Ableton Live
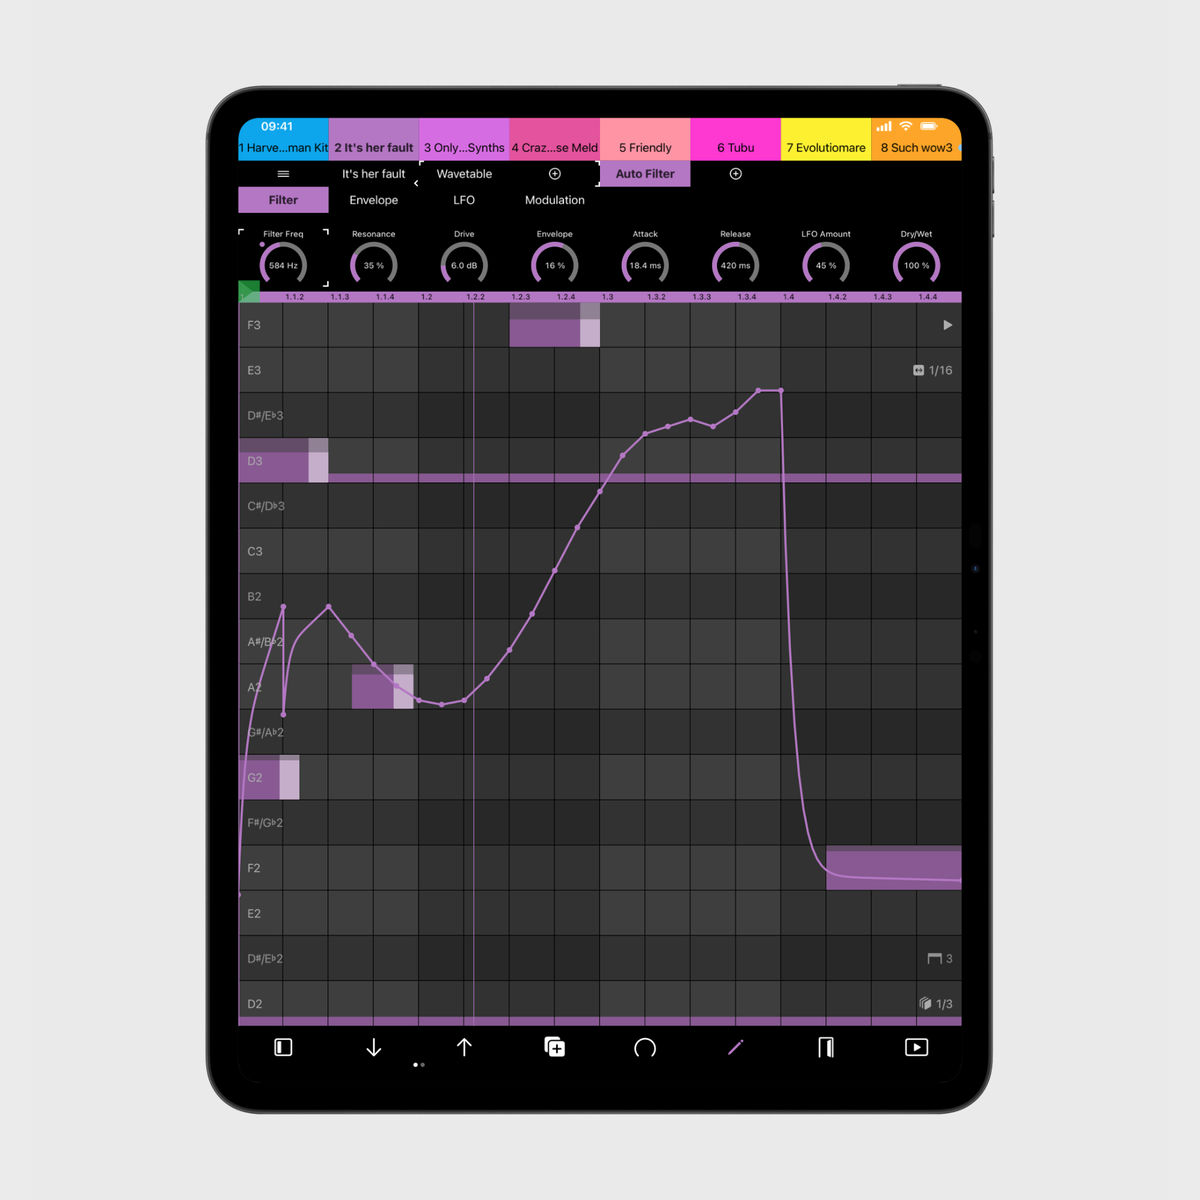
You want a controller that can do all of this well (yes, this list conveniently describes why Tap fits my needs):
- Play melodies and drums
- Sequence extremely fast, reliably, and with great editing tools
- Ideally have a companion system that can mutate patterns musically, giving you something dynamic to perform with
- Access macros and instrument controls quickly
- Offer mixer controls at the device level and deep parameter integration
- Move into drum rack pads and edit instruments and effects for each pad
- Modulate macros, automate them, and edit that automation
- Trigger scenes and clips
- Add and edit follow actions
- Mix and balance tracks
- Add, remove, and move effects, instruments, and presets
All of these actions need to become second nature so you can immediately realize any idea you have. Practice like hell. Make music a thing you do every day! Even if it is only 10 minutes a day. Short performances are better than no performances at all.
→ Really give Tap a try. I think it is the best Ableton Live controller out there.
If you are not convinced, check this comparison page for the best Ableton Live controllers in 2026 (also written by yours truly) to see where Tap shines compared to Push and other controller apps.
Musical Direction and Arrangement
I try to keep things simple. Start with a few strong sounds and a clear idea, then build outward from there. Too many sounds quickly become overwhelming. A minimal approach is often best for creativity.
Here is the general structure I often follow while improvising live:
- Find a central theme: bassline, beat, melody, pad, noise texture, FX, or sample
- Build several variations or intensifications of that theme
- Create a break or moment of release
- Introduce a counter-theme or new variation if needed
- Return to the original theme and repeat with different intensities
- Use another break to reset tension
- Search for a new theme with fresh synths or percussion
- Remove elements gradually while introducing new ones
- Go back to step 1.
General ideas:
- Alternate between subtraction and addition to keep movement alive
- For ambient sections, start with beautiful melodies or textures first, then bring in percussion later
- A great live set is often not about adding more. It is about knowing what to remove, when to create tension, and when to release it.
- Just try things and have no fear. Fear is the mind-killer.
Got questions, suggestions, comments, or just want to share this post?
→ Share on X, or email me (and I will add it to this post, if appropriate).